timdoug's tidbits
2023-02-25
Compile QEMU on macOS without tons of dependencies, M2 / Ventura editionA gentle update to the 2021 documentation.
$ export QEMU_INSTALL=/path/to/qemu/install
$ brew install pkg-config pixman pcre
$ python3 -m venv qemu_install_venv
$ source qemu_install_venv/bin/activate
(qemu_install_venv) $ pip install --upgrade pip setuptools wheel
(qemu_install_venv) $ pip install ninja meson
(qemu_install_venv) $ curl -LO https://download.gnome.org/sources/glib/2.74/glib-2.74.6.tar.xz
(qemu_install_venv) $ tar xf glib-2.74.6.tar.xz && cd glib-2.74.6
(qemu_install_venv) $ meson --prefix=${QEMU_INSTALL} _build
(qemu_install_venv) $ ninja -C _build
(qemu_install_venv) $ ninja -C _build install
(qemu_install_venv) $ cd .. && curl -LO https://download.qemu.org/qemu-7.2.0.tar.xz
(qemu_install_venv) $ tar xf qemu-7.2.0.tar.xz && cd qemu-7.2.0
(qemu_install_venv) $ PKG_CONFIG_PATH=${QEMU_INSTALL}/lib/pkgconfig/ ./configure --enable-hvf --enable-cocoa --target-list=x86_64-softmmu --prefix=${QEMU_INSTALL}
(qemu_install_venv) $ PKG_CONFIG_PATH=${QEMU_INSTALL}/lib/pkgconfig/ make install
Ahh, much better:
$ otool -L ${QEMU_INSTALL}/bin/qemu-system-x86_64 | grep -vE '^\W+(/usr/lib/|/System/Library/)'
qemu-system-x86_64:
	${QEMU_INSTALL}/lib/libgio-2.0.0.dylib (compatibility version 7401.0.0, current version 7401.6.0)
	${QEMU_INSTALL}/lib/libglib-2.0.0.dylib (compatibility version 7401.0.0, current version 7401.6.0)
	${QEMU_INSTALL}/lib/libgmodule-2.0.0.dylib (compatibility version 7401.0.0, current version 7401.6.0)
	${QEMU_INSTALL}/lib/libgobject-2.0.0.dylib (compatibility version 7401.0.0, current version 7401.6.0)
	/opt/homebrew/opt/libpng/lib/libpng16.16.dylib (compatibility version 56.0.0, current version 56.0.0)
	/opt/homebrew/opt/libusb/lib/libusb-1.0.0.dylib (compatibility version 4.0.0, current version 4.0.0)
	/opt/homebrew/opt/pixman/lib/libpixman-1.0.dylib (compatibility version 43.0.0, current version 43.2.0)
	/opt/homebrew/opt/sdl2/lib/libSDL2-2.0.0.dylib (compatibility version 2601.0.0, current version 2601.3.0)
$
2022-07-14
Use a CH9200 USB Ethernet adapter on macOS MontereyRecently I had an immediate need for hardwired network connectivity on my M1 Air, and could only secure a QinHeng CH9200 dongle that doesn't have macOS drivers. It's a USB 1.1 "full-speed" device, i.e., 12 Mbps, so decidedly archaic bandwidth, but still plenty for video conferencing, and, critically, low and consistent latency vs. 2.4 GHz Wi-Fi that drops when someone starts a microwave nearby. (Editors of The New Yorker: let me know if that is a sufficient comma count thx.)
Luckily mainline Linux has supported it since 2015, so we can virtualize Debian with QEMU and use USB passthru to establish connectivity. Modern macOS no longer supports TAP devices, so we can't bridge the virtualized network to the Mac, but we can (ab)use userland SLIRP and WireGuard to get packets flowing.
First build QEMU — I used version 7.0.0 — with the aarch64-softmmu target (s/aarch64/amd64/ if an Intel Mac) and create a disk image, then grab the Debian installer netboot kernel (filename linux) and initrd.gz. Install Debian with the following arguments, attaching the USB dongle accordingly:
qemu-system-aarch64 -nographic -m 1G -machine virt,accel=hvf -cpu host -kernel linux -initrd initrd.gz -append console=ttyAMA0 -hda debian_aarch64.img -device qemu-xhci -device usb-host,vendorid=0x1a86,productid=0xe092
The installer won't set up a bootloader, so when it's complete, nc the installed kernel and initrd to the Mac. After installation, start it up with port 11111 (or whichever) forwarded for WireGuard:
qemu-system-aarch64 -nographic -m 1G -machine virt,accel=hvf -cpu host -kernel vmlinuz -initrd initrd.img -append "console=ttyAMA0 root=/dev/vda1" -hda debian_aarch64.img -device qemu-xhci -device usb-host,vendorid=0x1a86,productid=0xe092 -nic hostfwd=udp::11111-:11111
Upon boot I had to run dhclient enp0s1 to bring up the userland SLIRP interface from which the Mac will connect; twiddling /etc/network/interfaces correctly should obviate this manual step.
Then install and configure WireGuard, ensuring the POSTROUTING interface in the config is correct; mine was of the form enx84**********. You should be all set!
2022-06-03
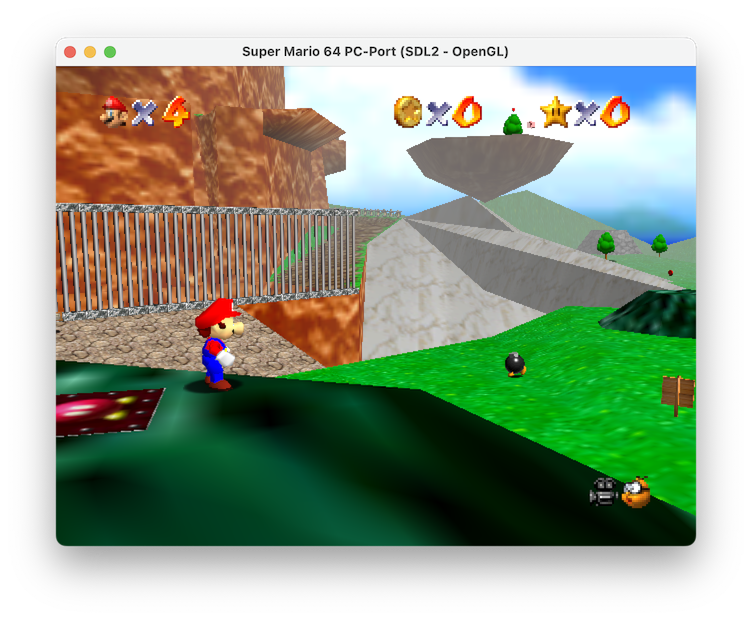
Play Super Mario 64 natively on an M1 MacCheckout https://github.com/sm64-port/sm64-port.git, apply the following super hacky diff, brew install gcc mingw-w64 make pkg-config sdl2 glew libusb, copy the ROM per the docs, and run gmake (for the newer brew version, not the old OS one).
$ file build/us_pc/sm64.us
build/us_pc/sm64.us: Mach-O 64-bit executable arm64
$ otool -L build/us_pc/sm64.us
build/us_pc/sm64.us:
	/opt/homebrew/opt/libusb/lib/libusb-1.0.0.dylib (compatibility version 4.0.0, current version 4.0.0)
	/opt/homebrew/opt/sdl2/lib/libSDL2-2.0.0.dylib (compatibility version 23.0.0, current version 23.0.0)
	/opt/homebrew/opt/glew/lib/libGLEW.2.2.dylib (compatibility version 2.2.0, current version 2.2.0)
	/opt/homebrew/opt/gcc/lib/gcc/11/libstdc++.6.dylib (compatibility version 7.0.0, current version 7.29.0)
	/System/Library/Frameworks/OpenGL.framework/Versions/A/OpenGL (compatibility version 1.0.0, current version 1.0.0)
	/usr/lib/libSystem.B.dylib (compatibility version 1.0.0, current version 1311.100.3)
$
Fascinating how we've gotten here, no?
diff --git a/Makefile b/Makefile
index cfac1e8..cf62291 100644
--- a/Makefile
+++ b/Makefile
@@ -456,10 +456,10 @@ export LANG := C

 else # TARGET_N64

-AS := as
+AS := i686-w64-mingw32-as
 ifneq ($(TARGET_WEB),1)
-  CC := gcc
-  CXX := g++
+  CC := gcc-11
+  CXX := g++-11
 else
   CC := emcc
 endif
@@ -468,8 +468,8 @@ ifeq ($(CXX_FILES),"")
 else
   LD := $(CXX)
 endif
-OBJDUMP := objdump
-OBJCOPY := objcopy
+OBJDUMP := i686-w64-mingw32-objdump
+OBJCOPY := i686-w64-mingw32-objcopy
 PYTHON := python3

 # Platform-specific compiler and linker flags
@@ -479,7 +479,7 @@ ifeq ($(TARGET_WINDOWS),1)
 endif
 ifeq ($(TARGET_LINUX),1)
   PLATFORM_CFLAGS  := -DTARGET_LINUX `pkg-config --cflags libusb-1.0`
-  PLATFORM_LDFLAGS := -lm -lpthread `pkg-config --libs libusb-1.0` -lasound -lpulse -no-pie
+  PLATFORM_LDFLAGS := -lm -lpthread `pkg-config --libs libusb-1.0` -no-pie
 endif
 ifeq ($(TARGET_WEB),1)
   PLATFORM_CFLAGS  := -DTARGET_WEB
@@ -497,8 +497,8 @@ ifeq ($(ENABLE_OPENGL),1)
     GFX_LDFLAGS += $(shell sdl2-config --libs) -lglew32 -lopengl32 -lwinmm -limm32 -lversion -loleaut32 -lsetupapi
   endif
   ifeq ($(TARGET_LINUX),1)
-    GFX_CFLAGS  += $(shell sdl2-config --cflags)
-    GFX_LDFLAGS += -lGL $(shell sdl2-config --libs) -lX11 -lXrandr
+    GFX_CFLAGS  += $(shell sdl2-config --cflags) -I/opt/homebrew/include
+    GFX_LDFLAGS += $(shell sdl2-config --libs) -L/opt/homebrew/lib -lGLEW -framework OpenGL
   endif
   ifeq ($(TARGET_WEB),1)
     GFX_CFLAGS  += -s USE_SDL=2
diff --git a/include/PR/os_libc.h b/include/PR/os_libc.h
index 94111c0..6a43358 100644
--- a/include/PR/os_libc.h
+++ b/include/PR/os_libc.h
@@ -3,8 +3,6 @@

 #include "ultratypes.h"

-// Old deprecated functions from strings.h, replaced by memcpy/memset.
-extern void bcopy(const void *, void *, size_t);
-extern void bzero(void *, size_t);
+#include <string.h>

 #endif /* !_OS_LIBC_H_ */
diff --git a/src/pc/controller/wup.c b/src/pc/controller/wup.c
index 9de54c1..35a37d3 100644
--- a/src/pc/controller/wup.c
+++ b/src/pc/controller/wup.c
@@ -1,4 +1,4 @@
-#if !defined(__MINGW32__) && !defined(__BSD__) && !defined(TARGET_WEB)
+#if !defined(__MINGW32__) && !defined(__BSD__) && !defined(TARGET_WEB) && !defined(__APPLE__)
 // See LICENSE for license

 #define _XOPEN_SOURCE 600
diff --git a/src/pc/gfx/gfx_opengl.c b/src/pc/gfx/gfx_opengl.c
index 7bc9745..51824cc 100644
--- a/src/pc/gfx/gfx_opengl.c
+++ b/src/pc/gfx/gfx_opengl.c
@@ -8,7 +8,7 @@
 #endif
 #include <PR/gbi.h>

-#ifdef __MINGW32__
+#if defined(__MINGW32__) || defined(__APPLE__)
 #define FOR_WINDOWS 1
 #else
 #define FOR_WINDOWS 0
diff --git a/src/pc/gfx/gfx_sdl2.c b/src/pc/gfx/gfx_sdl2.c
index 4fd5c43..79622a5 100644
--- a/src/pc/gfx/gfx_sdl2.c
+++ b/src/pc/gfx/gfx_sdl2.c
@@ -2,7 +2,7 @@

 #if !defined(__linux__) && !defined(__BSD__) && defined(ENABLE_OPENGL)

-#ifdef __MINGW32__
+#if defined(__MINGW32__) || defined(__APPLE__)
 #define FOR_WINDOWS 1
 #else
 #define FOR_WINDOWS 0
diff --git a/src/pc/pc_main.c b/src/pc/pc_main.c
index 89aa1fa..d1fde8d 100644
--- a/src/pc/pc_main.c
+++ b/src/pc/pc_main.c
@@ -196,7 +196,7 @@ void main_func(void) {
         audio_api = &audio_alsa;
     }
 #endif
-#ifdef TARGET_WEB
+#if defined(TARGET_WEB) || defined(__APPLE__)
     if (audio_api == NULL && audio_sdl.init()) {
         audio_api = &audio_sdl;
     }
2021-09-06
Compile QEMU on macOS without tons of dependencies, M1 / Big Sur editionAn update to the 2020 documentation.
$ export QEMU_INSTALL=/path/to/qemu/install
$ brew install pkg-config pixman pcre
$ python3 -m venv qemu_install_venv
$ source qemu_install_venv/bin/activate
(qemu_install_venv) $ pip install --upgrade pip setuptools wheel
(qemu_install_venv) $ pip install ninja meson
(qemu_install_venv) $ curl -LO https://download.gnome.org/sources/glib/2.69/glib-2.69.2.tar.xz
(qemu_install_venv) $ tar xf glib-2.69.2.tar.xz && cd glib-2.69.2
(qemu_install_venv) $ meson --prefix=${QEMU_INSTALL} _build
(qemu_install_venv) $ ninja -C _build
(qemu_install_venv) $ ninja -C _build install
(qemu_install_venv) $ cd .. && curl -LO https://download.qemu.org/qemu-6.1.0.tar.xz
(qemu_install_venv) $ tar xf qemu-6.1.0.tar.xz && cd qemu-6.1.0
(qemu_install_venv) $ PKG_CONFIG_PATH=${QEMU_INSTALL}/lib/pkgconfig/ ./configure --enable-hvf --enable-cocoa --target-list=x86_64-softmmu --prefix=${QEMU_INSTALL}
(qemu_install_venv) $ PKG_CONFIG_PATH=${QEMU_INSTALL}/lib/pkgconfig/ make install
Ahh, much better:
$ otool -L ${QEMU_INSTALL}/bin/qemu-system-x86_64 | grep -vE '^\W+(/usr/lib/|/System/Library/)'
/Users/timdoug/qemu_install/bin/qemu-system-x86_64:
	/Users/timdoug/.homebrew/opt/pixman/lib/libpixman-1.0.dylib (compatibility version 41.0.0, current version 41.0.0)
	/Users/timdoug/qemu_install/lib/libgio-2.0.0.dylib (compatibility version 6903.0.0, current version 6903.0.0)
	/Users/timdoug/qemu_install/lib/libgobject-2.0.0.dylib (compatibility version 6903.0.0, current version 6903.0.0)
	/Users/timdoug/qemu_install/lib/libglib-2.0.0.dylib (compatibility version 6903.0.0, current version 6903.0.0)
	/Users/timdoug/qemu_install/lib/libgmodule-2.0.0.dylib (compatibility version 6903.0.0, current version 6903.0.0)
$
2021-02-10
Fix Bluetooth audio issues on macOS Big SurI had all manners of issues that I couldn't figure out after trawling through Console.app logs:
- 3+ seconds of latency between hitting a play button and hearing audio
- Beach-balling when opening Zoom preferences
- Latency between pressing volume up/down keys and OS response
The solution: rm -r /Library/Audio/Plug-Ins/HAL/ACE.driver and restart. I had it from Rogue Amoeba's Audio Hijack; they're a great crew and I trust their kit, but for whatever reason this caused issues.
2020-12-28
Make keys repeat sanely in Citrix Viewer on a macOS Big SurNot sure if this change is a Citrix or Mac thing. Many thanks to Dennis Mathews for the tip.
$ defaults write com.citrix.receiver.icaviewer.mac ApplePressAndHoldEnabled -bool false
$
Then relaunch the process.
2020-08-30
Compile QEMU on macOS without tons of dependenciesbrew install qemu unnecessarily brings in Python, a DNS server, two TLS libraries, ....
Instead:
$ brew install pkg-config pixman
$ python3 -m venv qemu_install_venv
$ source qemu_install_venv/bin/activate
(qemu_install_venv) $ pip install ninja meson
(qemu_install_venv) $ curl -LO https://download.gnome.org/sources/glib/2.65/glib-2.65.2.tar.xz
(qemu_install_venv) $ tar xf glib-2.65.2.tar.xz && cd glib-2.65.2
(qemu_install_venv) $ meson --prefix=/path/to/qemu/install -Dinternal_pcre=true _build
(qemu_install_venv) $ ninja -C _build
(qemu_install_venv) $ ninja -C _build install
$ cd .. && curl -LO https://download.qemu.org/qemu-5.1.0.tar.xz
$ tar xf qemu-5.1.0.tar.xz && cd qemu-5.1.0
$ PKG_CONFIG_PATH=/path/to/qemu/install/lib/pkgconfig/ ./configure --enable-hvf --enable-cocoa --target-list=x86_64-softmmu --prefix=/path/to/qemu/install
$ PKG_CONFIG_PATH=/path/to/qemu/install/lib/pkgconfig/ make install
Ahh, much better:
$ otool -L /path/to/qemu/install/bin/qemu-system-x86_64 | grep -vE '^\W+(/usr/lib/|/System/Library/)'
/path/to/qemu/install/bin/qemu-system-x86_64:
	/path/to/qemu/install/lib/libgio-2.0.0.dylib (compatibility version 6503.0.0, current version 6503.0.0)
	/path/to/qemu/install/lib/libgobject-2.0.0.dylib (compatibility version 6503.0.0, current version 6503.0.0)
	/path/to/qemu/install/lib/libglib-2.0.0.dylib (compatibility version 6503.0.0, current version 6503.0.0)
	/path/to/qemu/install/lib/libintl.dylib (compatibility version 0.0.0, current version 0.0.0)
	/path/to/homebrew/opt/pixman/lib/libpixman-1.0.dylib (compatibility version 41.0.0, current version 41.0.0)
	/path/to/qemu/install/lib/libgthread-2.0.0.dylib (compatibility version 6503.0.0, current version 6503.0.0)
$
2020-04-19
Running a Windows 10 virtual machine with QEMU on macOSMicrosoft distributes a freely available image, but there are a few steps necessary for it to work with QEMU.
- Download the VirtualBox image and unzip.
- The .ova file is a tarball; extract.
- The .vmdk file is compressed, in a format to which QEMU can't write, resulting in Could not write to allocated cluster for streamOptimized errors. Convert to qcow2 with qemu-img.
- Start a modern system, using Hypervisor.framework, 4GB of RAM, and userland networking forwarding the RDP port as the VGA driver is functional but suboptimal:
qemu-system-x86_64 -machine q35 -accel hvf -m 4096 -nic user,hostfwd=tcp:127.0.0.1:3389-:3389 -hda WinDev2003Eval-disk001.qcow2
2020-01-26
Diagnosing WindowServer 50% CPU / ~50 FPS when seemingly idle in macOS MojaveThis seems to happen to me every time I twiddle time zone settings when traveling.
- iStat Menus (in my case; or similar) says the Intel GPU pushes 50 frames per second though the display is static
- Nothing particularly notable in Console.app.
- Tracing the WindowServer process in Activity Monitor.app (cmd-I; click "Sample") didn't point to any specific services
2019-11-12
Make keys repeat sanely in Citrix Viewer on a modern macOSNB: this is out of date. Consult newer docs.
$ defaults write com.citrix.XenAppViewer ApplePressAndHoldEnabled -bool false
$
Then relaunch the process.
2019-06-10
Compiling EncFS on macOS Mojave 10.14 with static OpenSSLProbably works on older versions, too.
- Install FUSE for macOS.
- brew install cmake
- curl -LO 'https://www.openssl.org/source/openssl-1.1.1c.tar.gz'
- tar xf openssl-1.1.1c.tar.gz && cd openssl-1.1.1c && ./config no-shared --prefix=/Users/$(whoami)/openssl && make install && cd ..
- git clone https://github.com/vgough/encfs.git && cd encfs && mkdir build && cd build
- cmake .. -DFUSE_INCLUDE_DIR=/usr/local/include/osxfuse/ -DFUSE_LIBRARIES=/usr/local/lib/libosxfuse.dylib -DOPENSSL_ROOT_DIR=/Users/$(whoami)/openssl/ -OPENSSL_USE_STATIC_LIBS=TRUE -DENABLE_NLS=OFF
- make -j4
$ otool -L encfs
encfs:
	/usr/local/lib/libosxfuse.2.dylib (compatibility version 12.0.0, current version 12.7.0)
	/usr/lib/libc++.1.dylib (compatibility version 1.0.0, current version 400.9.4)
	/usr/lib/libSystem.B.dylib (compatibility version 1.0.0, current version 1252.250.1)
$
2017-06-01
Installing Debian in xhyvexhyve is a nice and lightweight hypervisor for macOS. Getting Debian running on it requires a bit of effort though; the following instructions result in a functional installation with working networking.
- git clone https://github.com/mist64/xhyve.git
- Apply this patch so there's enough space for the installer ramdisk (thanks to this PR for the tip):
- make
- Grab the Debian installer kernel and initrd. I use the daily snapshots, but substitute accordingly.
curl https://d-i.debian.org/daily-images/amd64/daily/netboot/debian-installer/amd64/initrd.gz -o initrd.gz-installer curl https://d-i.debian.org/daily-images/amd64/daily/netboot/debian-installer/amd64/linux -o linux-installer
- Create an empty disk image: dd if=/dev/zero of=debian.img bs=1m count=8192
- Grab a UUID so the VM comes up with the same IP address every launch: python -c 'import uuid; print uuid.uuid4()'
- Run the Debian installer, changing options accordingly (1G is RAM size, the arguments to virtio-blk and the kexec firmware are paths): sudo ./build/xhyve -A -H -U <<<YOUR UUID HERE>>> -m 1G -s 0,hostbridge -s 1,lpc -s 2,virtio-blk,debian.img -s 3,virtio-net -l com1,stdio -f "kexec,linux-installer,initrd.gz-installer,earlyprintk=serial console=ttyS0" Feel free to skip bootloader installation, since we use xhyve's kexec implementation.
- We now need to grab the non-installer kernel and initrd out of the disk image.
- Boot into the installer's recovery mode by passing rescue/enable=true: sudo ./build/xhyve -A -H -U <<<YOUR UUID HERE>>> -m 1G -s 0,hostbridge -s 1,lpc -s 2,virtio-blk,debian.img -s 3,virtio-net -l com1,stdio -f "kexec,linux-installer,initrd.gz-installer,earlyprintk=serial console=ttyS0 rescue/enable=true"
- Use /dev/vda1 as the root filesystem and execute a shell there (both the defaults), then type bash to get a sane one.
- apt-get install netcat
- On the host run nc -l 8000 >vmlinuz, and on the VM run nc 192.168.64.1 8000 </boot/vmlinuz*. You'll have to manually ctrl-C after the (essentially instant) transfer is complete.
- Do the same for the initrd.img in /boot.
- Verify checksums and sanity otherwise:
host$ file vmlinuz initrd.img vmlinuz: Linux kernel x86 boot executable bzImage, version 4.9.0-3-amd64 (debian-kernel@lists.debian.org) #1 SMP Debian 4., RO-rootFS, swap_dev 0x3, Normal VGA initrd.img: gzip compressed data, last modified: Thu Jun 1 16:23:39 2017, from Unix host$
- Exit out of bash and the chroot, then "reboot" the system.
- Start your new VM, being sure to change the kernel/initrd paths and set the root partition's location accordingly: sudo ./build/xhyve -A -H -U <<<YOUR UUID HERE>>> -m 1G -s 0,hostbridge -s 1,lpc -s 2,virtio-blk,debian.img -s 3,virtio-net -l com1,stdio -f "kexec,vmlinuz,initrd.img,earlyprintk=serial console=ttyS0 root=/dev/vda1"
- Success! Install an SSH server, get work done, etc.
diff --git a/src/firmware/kexec.c b/src/firmware/kexec.c
index 61aeebb..2a5ce67 100644
--- a/src/firmware/kexec.c
+++ b/src/firmware/kexec.c
@@ -184,7 +184,7 @@ kexec_load_ramdisk(char *path) {
        sz = (size_t) ftell(f);
        fseek(f, 0, SEEK_SET);

-       ramdisk_start = ALIGNUP((kernel.base + kernel.size), 0x1000ull);
+       ramdisk_start = ALIGNUP((kernel.base + kernel.size + 32*1024*1024), 0x1000ull);

        if ((ramdisk_start + sz) > memory.size) {
                /* not enough memory */
- I know xhyve and Hypervisor.framework don't require root privileges, but the virtio-net implementation does. I haven't tried using a TUN/TAP device.
- Little Snitch, mDNSResponder, and xhyve have some sort of interaction that (at least with my configuration) requires explicit incoming/outgoing DNS access, otherwise it silently prevents networking from working. Once I whitelist the client IP and UDP/53 in my firewall rules, names are successfully resolved.
2014-04-21
How to Watch Sopcast/Ustream Feeds with VLC on Mac OS XFor certain international sports, the two most popular kinds of streams I've come across are Sopcast and Ustream. Both require a bit of work to set up, but they tend to provide 720p-quality and in VLC they don't contain the endless barrage of advertisements or cause Flash Player-related CPU hogging. I suggest you set everything up well in advance and test with non-sport streams.
Ustream
- Install Xcode through the App Store. This is needed to build the following tools.
- Download VLC and make sure to copy it to /Applications.
- Install Homebrew. The instructions on the page should be self-explanatory.
- Open Terminal.app and type:
- brew install rtmpdump
- sudo bash -c "CFLAGS=-Qunused-arguments CPPFLAGS=-Qunused-arguments easy_install cffi"
- sudo bash -c "CFLAGS=-Qunused-arguments CPPFLAGS=-Qunused-arguments easy_install python-librtmp"
- sudo easy_install livestreamer
- Once you've got a Ustream URL, open Terminal.app and type livestreamer http://www.ustream.tv/eukanuba substituting the URL appropriately. It'll spit out a list of quality settings.
- With that quality setting, now type livestreamer http://www.ustream.tv/eukanuba 480p (note the suffixed quality value) and it'll open VLC and start your stream. Make sure to leave Terminal.app open, or your stream will stop.
Sopcast
- Download the Mac .dmg from here.
- Mount the downloaded disk image but don't do anything with the application.
- Open Terminal.app and type mkdir -p ~/bin && cp /Volumes/SopCast/SopCast.app/Contents/Resources/binaries/m32/sp-sc-auth ~/bin. You can now unmount and remove the disk image. Everything up to now you only need to do once.
- When you've found a stream, open Terminal.app again and type ~/bin/spsc-auth sop://broker.sopcast.com:3912/xxxxxx 3000 3001 (substituting the Sopcast URL appropriately) and leave it running. If you quit Terminal.app it'll stop the stream.
- Open VLC and go to File -> Open Network.... In the URL field type http://localhost:3001 and click Open; you should be good to go.
2012-12-22
My 2007-era MacBookPro3,1 doesn't fully go to sleep / cannot wake from sleep with 10.8!Yep, I had a reason to break out my old MBP and install the newest version of OS X on it. It works wonderfully for a five year old box (the SSD sure helps!), except for not being able to sleep properly. What worked for me was disabling "safe sleep" a la this hint.
sudo pmset -a hibernatemode 0
sudo nvram "use-nvramrc?"=false
Then restart. You can also remove /private/var/vm/sleepimage to save some space, which is nice.
2012-02-08
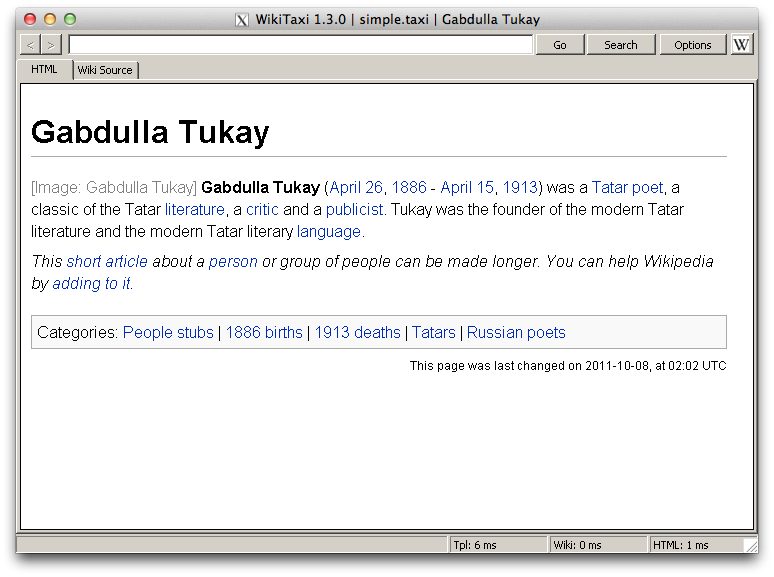
Offline Wikipeda on Mac OS X- Install Homebrew.
- brew install --use-gcc wine
- Prefix the WikiTaxi binaries with wine, e.g., wine WikiTaxi_Importer.exe, and otherwise follow the instructions on the WikiTaxi page.
2010-08-25
Compiling for older versions of Mac OS XIn preparation for a pending semi-major release of unpkg, I needed to compile some source for other architectures and older versions of Mac OS X on my Snow Leopard MacBook Pro. After quite some time DuckDuckGoing and wrestling with gcc, I came across these combinations of environment variables that seem to do the trick. (The following, of course, require the appropriate 10.4 and 10.5 SDKs to be installed in /Developer/SDKs.)
10.4 and PowerPC
CC="gcc-4.0 -arch ppc" \
CXX="g++-4.0 -arch ppc" \
CFLAGS="-mmacosx-version-min=10.4" \
CPPFLAGS="-DMAC_OS_X_VERSION_MIN_REQUIRED=1040 -nostdinc \
-F/Developer/SDKs/MacOSX10.4u.sdk/System/Library/Frameworks \
-I/Developer/SDKs/MacOSX10.4u.sdk/usr/lib/gcc/powerpc-apple-darwin10/4.0.1/include \
-isystem /Developer/SDKs/MacOSX10.4u.sdk/usr/include" \
LDFLAGS="-arch ppc -mmacosx-version-min=10.4 \
-L/Developer/SDKs/MacOSX10.4u.sdk/usr/lib \
-F/Developer/SDKs/MacOSX10.4u.sdk/System/Library/Frameworks \
-Wl,-syslibroot,/Developer/SDKs/MacOSX10.4u.sdk" \
./configure --build=`uname -p`-apple-darwin --host=powerpc-apple-darwin
10.4 and i386
CC="gcc-4.0 -arch i386" \
CXX="g++-4.0 -arch i386" \
CFLAGS="-mmacosx-version-min=10.4" \
CPPFLAGS="-DMAC_OS_X_VERSION_MIN_REQUIRED=1040 -nostdinc \
-F/Developer/SDKs/MacOSX10.4u.sdk/System/Library/Frameworks \
-I/Developer/SDKs/MacOSX10.4u.sdk/usr/lib/gcc/i686-apple-darwin10/4.0.1/include \
-isystem /Developer/SDKs/MacOSX10.4u.sdk/usr/include" \
LDFLAGS="-arch i386 -mmacosx-version-min=10.4 \
-L/Developer/SDKs/MacOSX10.4u.sdk/usr/lib \
-F/Developer/SDKs/MacOSX10.4u.sdk/System/Library/Frameworks \
-Wl,-syslibroot,/Developer/SDKs/MacOSX10.4u.sdk" \
./configure
10.5 and x86_64 -- the 10.4 gcc-4.0 can't compile for x86_64, so we have to use 10.5 instead.
CC="gcc-4.2 -arch x86_64" \
CXX="g++-4.2 -arch x86_64" \
CFLAGS="-mmacosx-version-min=10.5" \
CPPFLAGS="-DMAC_OS_X_VERSION_MIN_REQUIRED=1050 -nostdinc \
-F/Developer/SDKs/MacOSX10.5.sdk/System/Library/Frameworks \
-I/Developer/SDKs/MacOSX10.5.sdk/usr/lib/gcc/i686-apple-darwin10/4.2.1/include \
-isystem /Developer/SDKs/MacOSX10.5.sdk/usr/include" \
LDFLAGS="-arch x86_64 -mmacosx-version-min=10.5 \
-L/Developer/SDKs/MacOSX10.5.sdk/usr/lib \
-F/Developer/SDKs/MacOSX10.5.sdk/System/Library/Frameworks \
-Wl,-syslibroot,/Developer/SDKs/MacOSX10.5.sdk" \
./configure
Then combine the binaries, like so: lipo foo-i386 foo-ppc foo-x86_64 -output foo-fat -create.
2009-12-28
Using SheepShaver on Mac OS XBuild as listed on the website. Video uses X and audio goes through CoreAudio, so you don't need SDL. A few other bits of information, though:
- For working keyboard shortcuts, disable "Enable key equivalents under X11" in X11.app.
- For sound output, select "Built-in" in the Sound control panel.
- Launch with this command:
./SheepShaver --rom /wherever/macos.rom --disk /wherever/harddrive.img --frameskip 0 --ramsize 268435456 --ignoresegv true --ignoreillegal true --ether slirp --idlewait true --keycodes true --keycodefile keycodes
This gives you working ethernet, keyboard shortcuts, smooth video, 256MB of RAM, and better stability through ignoring SEGV and illegal instructions.
2009-08-25
Yet Another MSI Wind Hackintosh TutorialJust contributing my method. General outline: install OSX on an external drive from a MacBook, then copy the installation to the internal Wind drive.
Requirements:
- MacBook
- Leopard DVD
- External HD / USB drive (I'm using a 320GB one -- anything that can hold an OSX installation should work)
- Mac OS X 10.5.7 Combo Update
- Chameleon
- SuperDuper!
- CyberGreg's driver pack (google around)
- Boot the MacBook from the Leopard DVD.
- Partition the external drive, with a GUID scheme.
- Reboot and install the 10.5.7 update (newest 10.5.8 doesn't have good support at time of writing), reboot.
- Install CyberGreg's driver pack.
- Install Chameleon on the external drive.
- Boot the Wind from the external drive.
- Use SuperDuper to copy the OSX installation to the interal drive.
- Run Chameleon again on the interal drive.